How to push notifications for Android
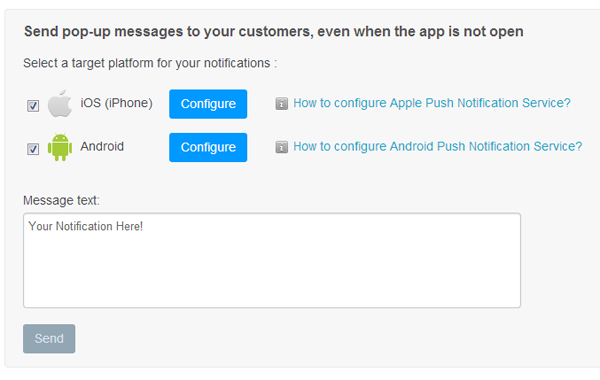
Push Notification messages will pop up on your users' phones, even when the app is not running. Notifications are managed through "Notifications" tab on your App Management panel.
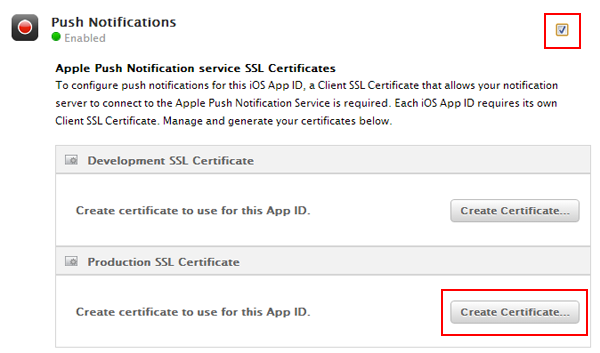
NOTE: Push Notifications is a premium feature, only available for apps on a premium plan.
IMPORTANT: in order to enable Push Notifications in your app, you should configure the Google Push Notification Service on the Notifications page.
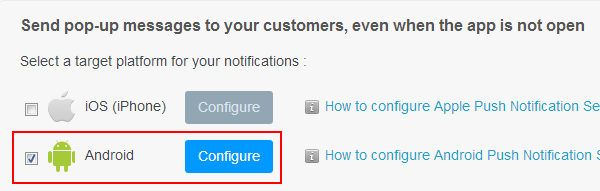
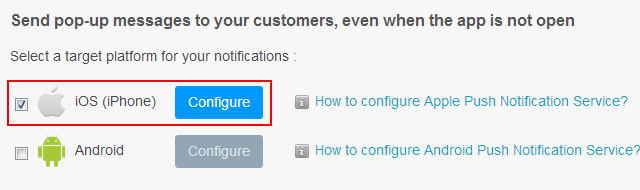
- Select "Android" as a target platform and click on "Configure" button to configure the Push Notifications for Android Service:
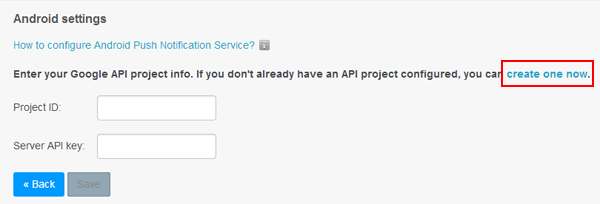
- If you have not configured Google API project yet, click "create one now" link:
- Log into your Google account on https://code.google.com/apis/console/ (or register if you do not have one: https://accounts.google.com/SignUp)
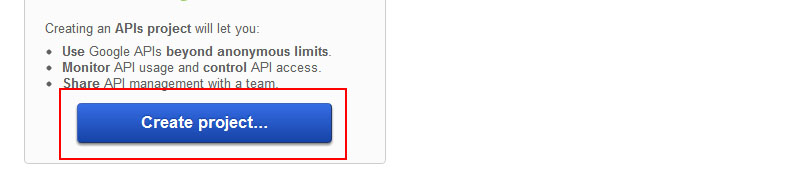
- To set up the push notification service in your app you have to create a Google API Project (https://developers.google.com/console/help/) . On the https://code.google.com/apis/console/ page, click "Create project..." button:
- On the next page, enable "Google Cloud Messaging for Android" (switch the trigger in ON state):
- Select "API Access" link from the left sidebar:
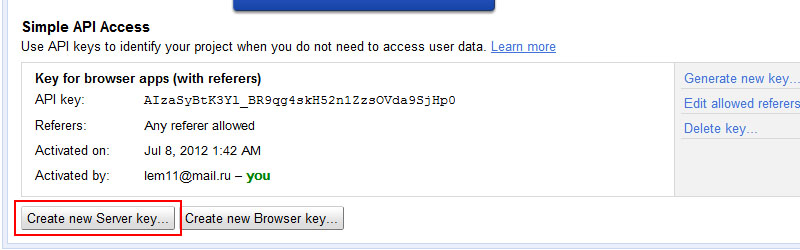
- On the API ACCESS page, click on the "reate new Server key..." button to create a key (do not mix it up with "Create Browser Key" button):
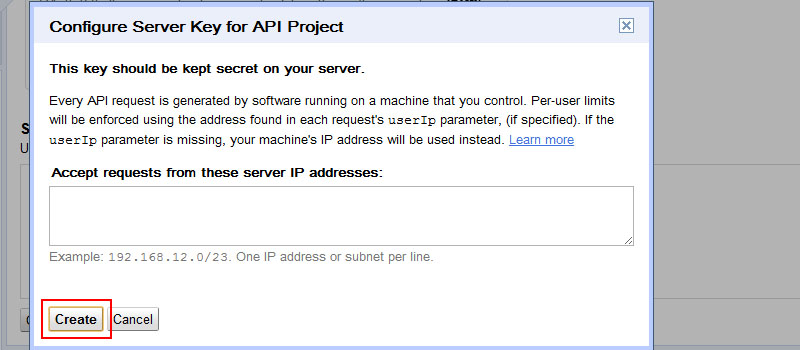
- On the "Configure Server Key for API Project" popup, click "Create" button (leave the "Accept requests from these server IP addresses" field blank):
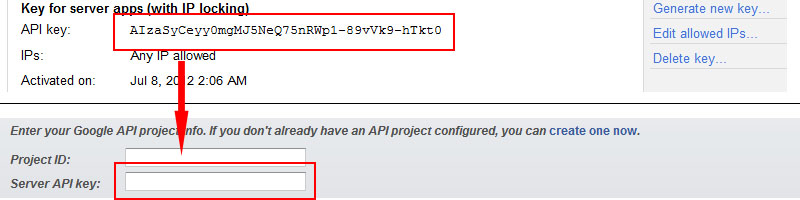
- From the "Key for server apps (with IP locking)" section, copy the API key provided:
- Go back to iBuildApp website and paste that API key to the "Server API key" field:
- Go back to the Google website and locate your Project ID from your browser’s address line (12 digits followed by ":access"):
- Copy that number.
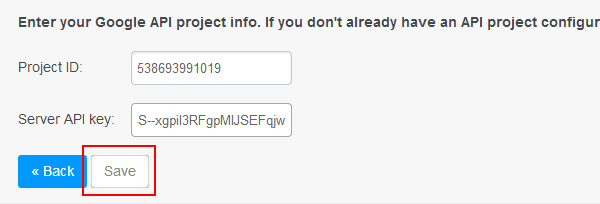
- Go back to iBuildApp website (Notifications page) and paste your Project ID into the "Project ID" field:
- Click "Save" button:
- Click "OK" on the confirmation popup window and start pushing notifications to your customers!