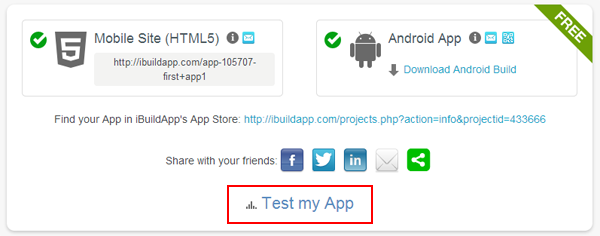
How to test your App
To test your app refer to "Publish" page and allocate "Test my App" link and click it.
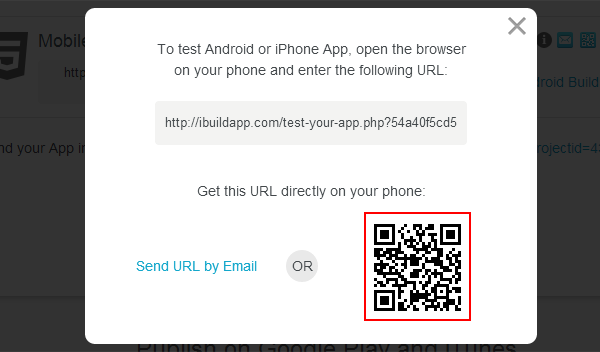
Scan QR code in the popup window with your device. Installation of your build will start automatically.
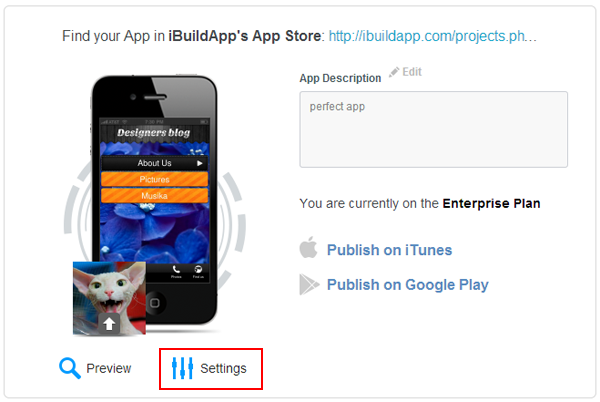
How to publish App on iBuildApp's App Store
To publish your app on iBuildApp’s App store refer to your Dashboard, allocate "Settings" link and click it:
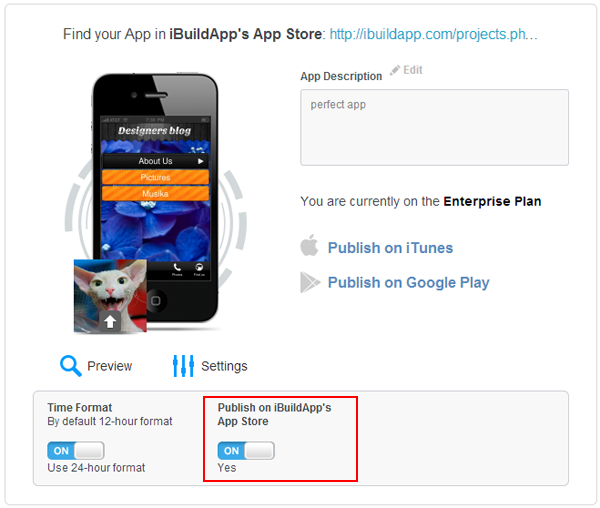
In the opened section turn "Publish on iBuildApp's App Store" on
How to publish App on iTunes
To publish your app on Apple store you’ve got to follow the steps described below:
Register as an Apple Developer
To publish an app through the Apple App Store, you need to have an Apple Developer account and be a member of the iOS Developer Program. Your app also needs to meet Apple's App Store guidelines.
The first step towards publishing your applications on app store is to sign up for the iPhone Developer Program at https://developer.apple.com/iphone/program/. There are two programs available - Standard and Enterprise. For most developers wanting to release applications on the App Store, they can simply sign up for the Standard program, which costs US$99. Check out https://developer.apple.com/iphone/program/apply.html to know more about the differences between the Standard and Enterprise programs.
-
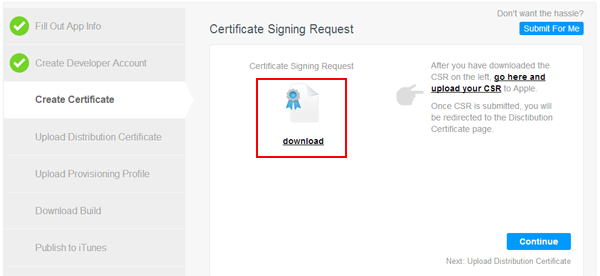
Get your Certificate Signing Request (.csr file) on iBuildApp.com
To initiate the process, go to your publishing page on iBuildApp.com and download your .csr file:
-
Go to apple.developer.com to create Distribution Certificate, App Id & Mobile Provisioning Profile.
-
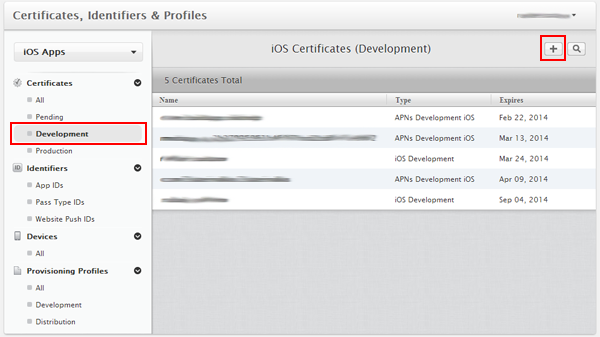
Create Distribution Certificate
Allocate Certificates -> Development -> Add Certificate, then follow the steps described on the screens.
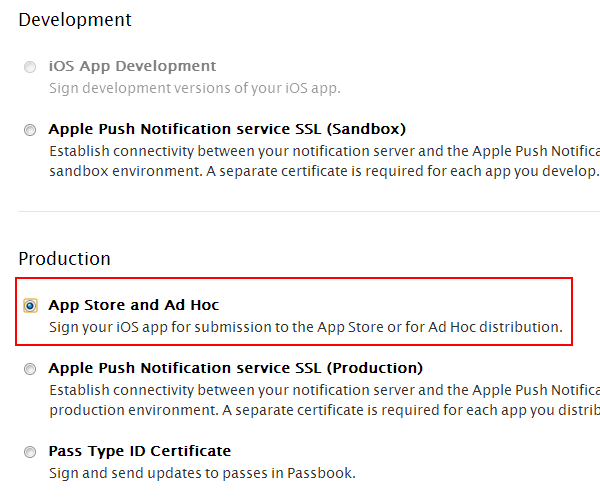
Refer to your Apple developer account (developer.apple.com) and create your developer certificate: Certificates -> Development -> Add Certificate:
Choose "App Store and Ad Hoc" certificate type under "Production" section and click next:

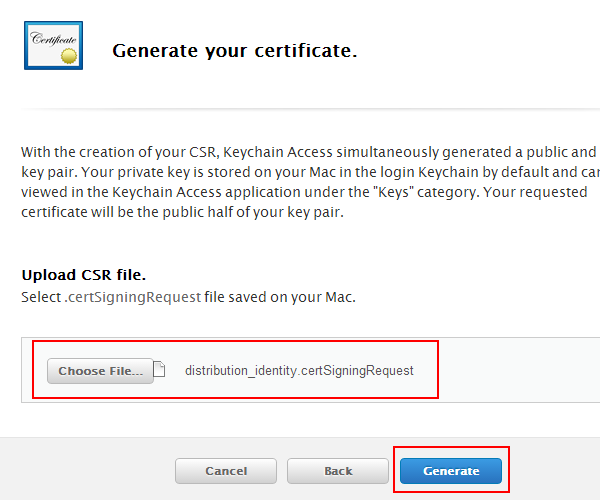
Then upload your Certificat Signing Request, that you’ve downloaded from iBuildApp.com and click "Generate" button:
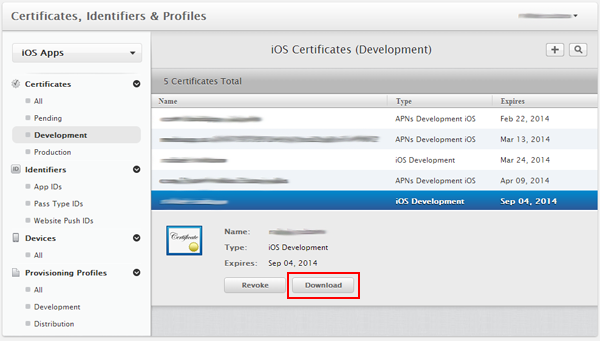
As soon as it’s ready download your Distributation Certificate:
NOTE: You can create several apps under one and the same Development certificate.
-
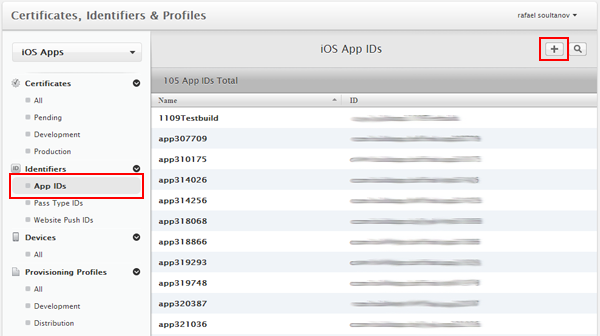
Create App ID
Allocate Identifiers -> App IDs -> Add New, then follow the steps described on the screens.
Use the following options:
- App ID Description -> Name: choose your App ID name, it can be similar to your app name;
- App ID Suffix -> Explicit App ID -> Bundle ID: Apple recommends using a reverse-domain name style string (i.e., com.domainname.appname). It cannot contain an asterisk (*).
App (on iTunes - Bundle) ID is a unique indentifier of your app. Once created it could not be deleted. In future when you release your app updates you will have to use the same App (Bundle) ID.
Refer to developer.apple.com to the Identifiers section and click "Create new":
Fill in fields on the next screen paying attention on the following:
- App ID Description -> Name: choose your App ID name, it can be similar to your app name;
- App ID Suffix -> Explicit App ID -> Bundle ID: Apple recommends using a reverse-domain name style string (i.e., com.domainname.appname). It cannot contain an asterisk (*).
Leave all the other fields blank unless you need to ser push notifications.
As soon as you’ve filled in all the fields click "Continue" button and "Done" on the next screen.
Thant's it! You do not need to download anything from developer.apple.com. You will need your Bundle ID on the next step.
-
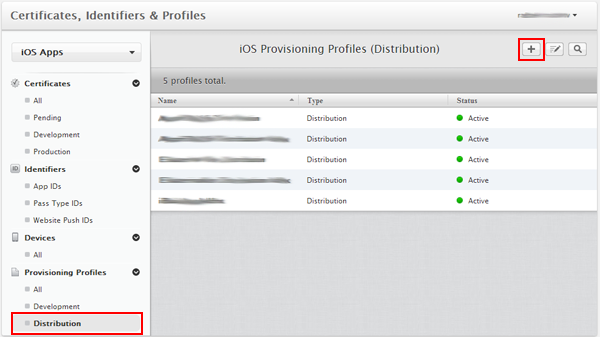
Create Mobile provision profile
Allocate Provision Profiles -> Deistribution -> Add New. Use Distribution Certificate & App ID you’ve cerated on previouse steps.
The next step is to create your Mobile Provision. Refer to Provision Profiles -> Distribution section and click "Add New" button.
Choose "Distribution" -> "App Store" and click "Continue" button:
Then find your App (Bundle) ID in the drop downlist and click "Continue" button.

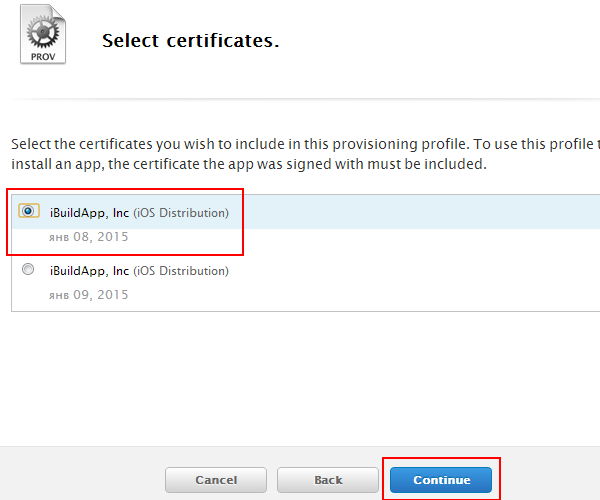
Choose valid Distribution Certificate on the next screen and click "Continue" button:
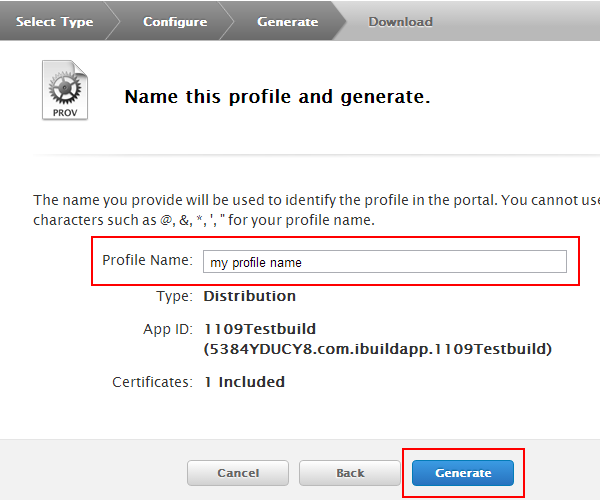
Enter you profile name and click "Generate" button:
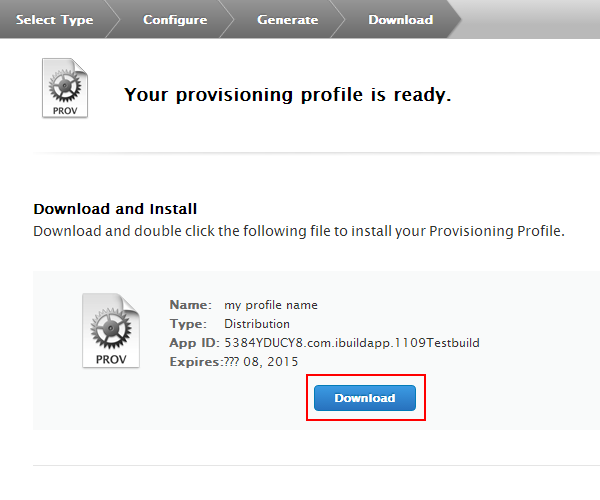
Now you can download your Provision Profile:
That's it!
-
-
Create your app build on iBuildApp.com
Now it’s time to get back to iBuildApp.com to you publishing page:
- Upload your Distribution Certificate at "Upload Distribution Certificate" section;
- Upload you MobileProvision Profile on "Upload Provision Profile" section;
- Click "Continue" buttom to create the build. You will be taken to building progress bar. As soon as it’s completed your build’s done and you can download it on your computer.
-
Set your app description on iTunesConnect.com
Login to iTunes connect under your developer account and select 'Manage Your Applications' and click "Create New" button. Provide all the information needed:
- App name
- Bundle ID (choose the one you’ve just created)
- App info
- App rating
- Icons & Splashscreens
Save the info and switch to Ready to upload binary mode.
Login to iTunes connect under your developer account and select 'Manage Your Applications':

Click on Add New Application button:

Enter App Name and select your Application bundle:

Enter your application info:

Define rating of your application

Upload your logo icon (size 512x512 px) and screenshots:

-
Publish your app build with the help of Application loader.
The last step towards publishing your app on App Store is uploading your binary you’ve created on iBuildApp.com with the help of Application Loader:
- Open Application Loader and login with the use of you Apple Developer credentials;
- Click Deliver your app and choose the one you would like to upload from the dropdown list;
- Choose the app file you’ve downloaded from iBuildApp.com and upload it to iTunes.
That’s it! Now your app has now been submitted to Apple for review.
NOTE: Application Loader is only availabe for use on Mac computers.
If you have downloaded iOS SDK 3.2 or later, you already have Application Loader stored here: /Developer/Applications/Utilities/Application Loader.app. Otherwise download and install the Xcode 4.2 & iOS SDK 5.0 from https://developer.apple.com/devcenter/ios which installs Application Loader automatically.
Open Application Loader:
Enter login and password for your apple developer account and click next:
Upload your app on iTunes Connect - select "Deliver Your App":
Once done, you can upload your app on iTunes Connect. Open App ZIP archive:

Before uploading your binary code you must register for uploading your application on iTunes Connect. Select app from the list and click 'Next':

Approve the uploading and you're done!
How to publish App on Google Play
The first step towards publishing your applications on app store is to sign up for the Google Developer Program at https://play.google.com/apps/publish/v2/signup/. There is one program available, which costs $25 (one time fee).
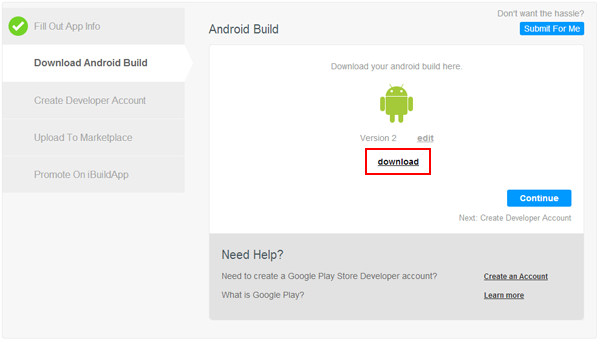
First refer to your Publish page, allocate "Publish on Google Play" click it and click "Do it Myself" on the next screen. Build process will start automatically. Once your build is ready download it on your computer:
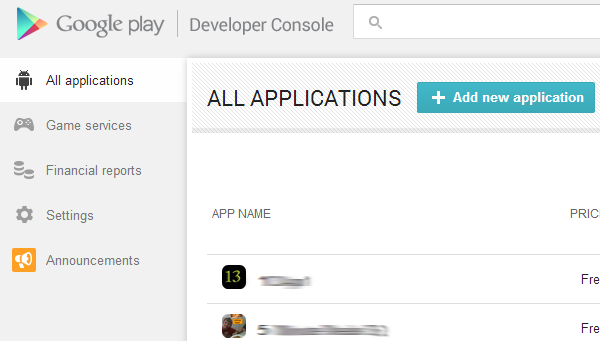
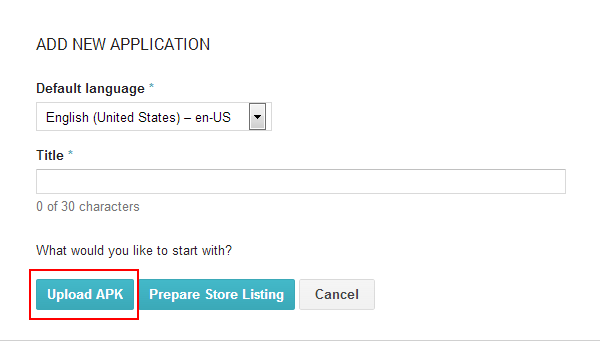
Refer to Developer Google play and create a new app:
In the popup choose your app language, app title and upload your .apk file to production:
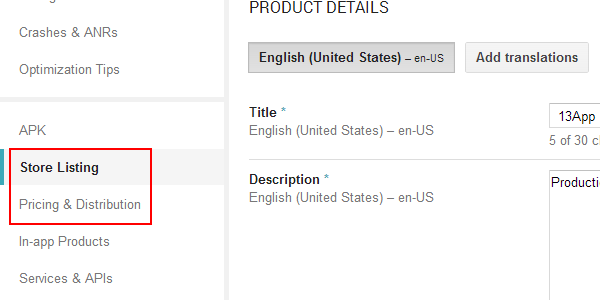
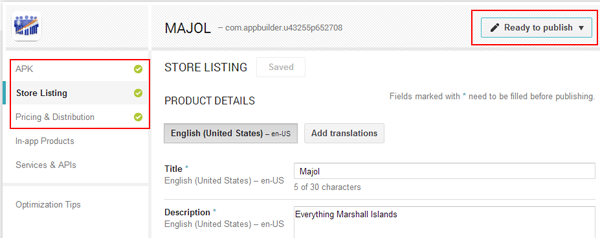
Then fill in Store Listing and Pricing & Distribution tabs:
As soon as it’s done you can publish your app:
NOTE: Google takes up to 24h to publish your app.
How to review HTML5 version of my app
To review your app HTML5 version refer to Publish page and find your HTML5 link:
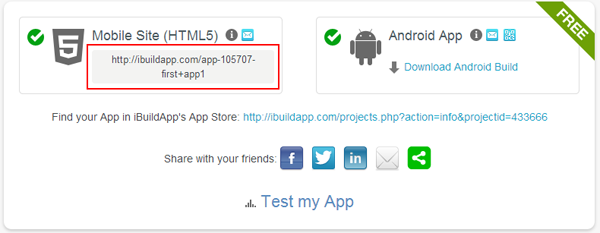
You can provide your customers with this link.
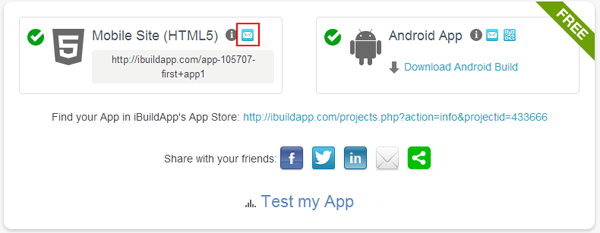
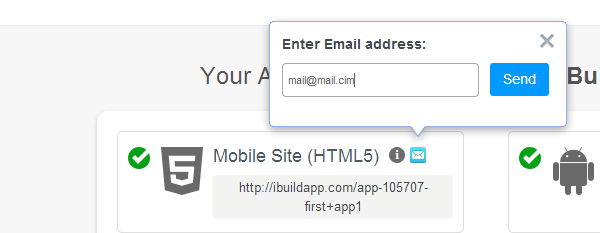
You can also share your HTML5 version via email. Click the icon shown on the screen fill in the email field in the popup and send the letter.
How do I create a custom domain for my mobile site
To use your custom domain name with your mobile site, you have to upgrade to Basic, Business or Enterprise plan. Once you’ve upgraded to a premium plan, the custom domain feature will be enabled on both Publish and Dashboard pages.
Follow these steps to point your domain name to your mobile site:
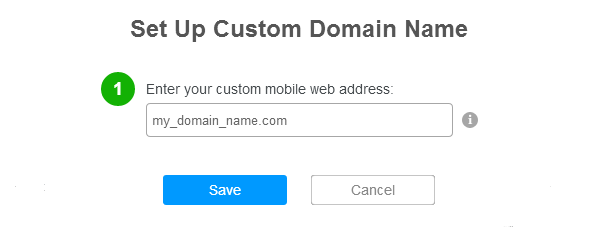
- From your Publish or Dashboard page, click on the "Custom Domain Name" button:

- Enter your custom domain name and click "Save".
If you don’t already have a domain name, you should buy it from your provider of choice (GoDaddy, Hover, Bluehost, 1and1, NetworkSolutions, CrazyDomains, etc)
- Configure your DNS: copy the parameter provided on the popup window, then visit your hosting provider and create a CNAME record for your domain.
A Canonical Name or CNAME record is a type of DNS record that maps an alias name to a true or canonical domain name. CNAME records are typically used to map a subdomain such as www to the domain hosting that subdomain’s content. For example, a CNAME record can map the web address www.example.com to the actual web site for the domain example.com.
Here is the example of a valid CNAME record:
mobile_site.com | IN CNAME | parameter, where "mobile_site.com" is your mobile site name.NOTE: If you are unsure how to manage your DNS settings, please contact your domain provider for help.
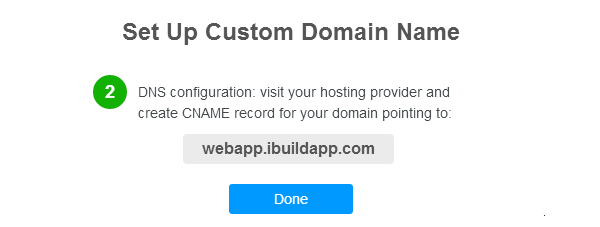
When you’re finished, click ‘Done’ to proceed
- Wait while the system checks your domain name configuration. This may take up to 10 seconds.
- Once validated, your domain name will get connected to your mobile website.
How to set up mobile site redirect
Weebly
NOTE: If you would like to use custom domain, do it before you set up the redirect.
- Login to your Weebly.com account;
- On "My sites" page, locate the site you’d like to edit and click "Edit" button;
- On the site builder, click on the "Elements" tab and locate "Custom HTML" widget. Drag the widget and drop it into the top of the page. Once inserted into the page, click on the Custom HTML widget to edit it;
- Delete pre-filled text and paste the redirect code from iBuildApp site into the HTML widget. Click outside the widget area to save changes.
That's it - you can visit your website on your mobile phone and make sure it’s redirecting correctly.
Joomla
NOTE: If you would like to use custom domain, do it before you set up the redirect.
- Login to your Joomla Admin account.
- From the top menu, select "Extensions" and click "Template Manager"
- Locate the default template for your site (it’s marked with a star), click on the "Templates", locate the template and click on it;
- From the "Template Master Files" area, click on the "Main page template" link to edit the template directly;
- Find the HEAD tag and paste the redirect script you’ve copied before from iBuildApp site, directly after the <head> tag.
- Click "Save" to save the changes.
That's it - you can visit your website on your mobile phone and make sure it’s redirecting correctly.
Wordpress
NOTE: If you would like to use custom domain, do it before you set up the redirect.
- Login to your Wordpress Admin account.
- From the left menu, select "Appearace" and click "Editor"
- From the dropdown list on your right choose the theme currently used on your site;
- Select header (header.tpl.php) or index.tpl.php template from the right sidebar;
- On the edit area, locate the HEAD tag and paste the redirect script you’ve copied before from iBuildApp site, directly after the <head> tag.
- Click "Save" to save the changes.
That's it - you can visit your website on your mobile phone and make sure it’s redirecting correctly.